My Ultimate Travel Ukulele

Joined
Jan 13, 2020
Messages
14
Reaction score
42
Location
Western Colorado
Design goals:
I wanted to make a compactly portable baritone ukulele with full playing comfort that I could play quietly in hotel rooms or late at night, or not far from where camping companions slept, or in airports or in other populated places. Because, though I hate to admit it, my beautiful flailings upon my instrument are not universally welcomed at all places at all times.

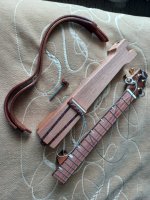
I allowed myself to be inspired by a certain well known guitar by a major company, but would have to find my own path forward. Fully assembled, it should be comfortable and familiar. For ease of travel, it should disassemble into smaller components. A removable pair of nesting skeletal bouts would trim its packable width. And, for those travels requiring ultimate compactness, the strings could be loosened and the body and neck separated. I wanted a standard, familiar headstock, but allowed that it should be minimized. And chose to add an undersaddle pickup, for use with a recording device and headphones, or to serve in the event that I be suddenly asked to grace a stage. (This happens all the time in my imagination, but in actuality is such a rare event that it has never happened.)

I dove in, unsure exactly where and how or if it would all come together as hoped. I present this list of materials:

Body and neck - Spanish cedar
Bouts - sapele
Fingerboard and bridge - machiche
Fingerboard binding - pheasantwood
Fret markers - tagua nut
Structural reinforcement - straight grain walnut
Decorative highlights - figured walnut from a friend who harvested it on family property some years ago.
Frets - medium nickel silver
Neck bolt - 1/4" w/walnut and machiche knob
End latch - walnut/machiche
End pin - brass
Tuners - Grover Sta-Tite
Strings - Aquila Lava
Pickup - Fishman undersaddle

Resized_20230124_113759~2.jpegResized_20230124_102902~2.jpegResized_20230124_110704.jpegResized_20230124_110426.jpegResized_20230124_110541.jpegResized_20230124_110616.jpegResized_20230124_102927.jpegResized_20230124_110507.jpeg
 
Part II: A Glimpse at the Process

I cut sapele slats and laminated three layers each, nesting one set inside the other. I stacked two cedar blocks for the body, and I glued up an entirely too-thick neck blank, due to inexperience and the as yet unknown parameters of both the design and my first volute.

After some modeling work with another neck and packing foam, I had learned enough to form a basic direction for moving forward.

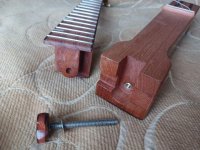
The fret slots were cut at the shop of Beau Hannam, who has been gracious with his thoughts, tips, assistance and inspiration. I cut mortise and tenon to hold neck to body (belatedly adding a walnut block for strength in the heel). And slotted for the bout attachments.

From there, it was a matter of reduction. Lots of thinking, drawing, formulating, re-thinking, yes. But reduction: carving the neck, reducing the bouts, and trimming away the body for both function and aesthetics.

Finally, the important work that every true luthier knows but that I, inexperienced in these arts, had not done before: Fretting and fret work, bridge placement, saddle and nut.

I will admit to hastening through these last, and without proper adult supervision. Thus, these important details are in need of review. Yet, I've been playing happily and quietly in a hotel room this week. So... A provisional success. And it is my thought that others here on the forum might be interested in the results.

Resized_20221002_175550.jpegResized_20221003_114344(1).jpegResized_20221016_145149.jpegResized_20221108_130117.jpegResized_20230101_104758.jpegResized_20230104_140949.jpegResized_20230109_123247.jpegResized_20230120_224751.jpegResized_20230113_095134.jpeg
 
Part II: A Glimpse at the Process

I cut sapele slats and laminated three layers each, nesting one set inside the other. I stacked two cedar blocks for the body, and I glued up an entirely too-thick neck blank, due to inexperience and the as yet unknown parameters of both the design and my first volute.

After some modeling work with another neck and packing foam, I had learned enough to form a basic direction for moving forward.

The fret slots were cut at the shop of Beau Hannam, who has been gracious with his thoughts, tips, assistance and inspiration. I cut mortise and tenon to hold neck to body (belatedly adding a walnut block for strength in the heel). And slotted for the bout attachments.

From there, it was a matter of reduction. Lots of thinking, drawing, formulating, re-thinking, yes. But reduction: carving the neck, reducing the bouts, and trimming away the body for both function and aesthetics.

Finally, the important work that every true luthier knows but that I, inexperienced in these arts, had not done before: Fretting and fret work, bridge placement, saddle and nut.

I will admit to hastening through these last, and without proper adult supervision. Thus, these important details are in need of review. Yet, I've been playing happily and quietly in a hotel room this week. So... A provisional success. And it is my thought that others here on the forum might be interested in the results.

View attachment 147652View attachment 147653View attachment 147654View attachment 147655View attachment 147656View attachment 147657View attachment 147658View attachment 147659View attachment 147660
Very cool. Nicely done with an interesting look. Rough framing carpentry is the best I can muster so always impressed with luthier efforts.
 
This is definitely an impressive build, nice work!

I am however curious how much of a hassle it is explaining this to airport security?
 
I really like this, it's such an interesting idea and a wonderful interpretation of the travel uke. So cool! I think it looks really neat. Well done!
 
Lovely work. I think you’re onto something
 
Thanks for the comments, folks. I appreciate the response. I'll try to answer the questions.

Airport Security: I don't know. I haven't traveled by air with it. I recently traveled by air with an Out Loud baritone (as I now call it, since I have this Quiet one) and no one batted an eye. I expect a similar reaction, but who knows? I did choose wood that isn't restricted. And also made sure the ends of the carbon neck rod are blunt -- just in case of x-ray questions.

Weight: If I scrunch my eyes with one in each hand, it seems just slightly lighter than my Lanikai MA-B, a relatively inexpensive mahogany plywood model. My scale is too small to weigh the Lanikai. But I took mine apart and weighted the parts separately for a total of 785g.

Sound sample: In my haste to have it ready-ish for last week's traveling, I left some unfinished business. I need to refine the set-up. And to solder the pickup to the jack. At some point I'll record a comparison between its quiet mode and the plugged in sound. But I'm traveling again this weekend for most of February, so... There will be a delay.

As it is, it's easy enough for me to hear in a quiet room, singing along about as quietly as I'm able. Which is what I was aiming for. It was more difficult to hear while lounging in the back seats of a fairly normal-plush double cab truck at highway speeds. I expect to be able to plug it into my portable recorder and use headphones for those times when the background overwhelms it.

Most important, since this is MY ultimate travel uke, it is quiet enough that, with only a short amount of carefully considered distance, my dearly beloved will not be subjected to the slings and arrows of the outrageous misfortune of listening to me practice. And I, in return, will thus not be subjected to the slings and arrows of her displeasure, which has, thus far at least, fallen short of exhibiting itself via actual slings and arrows. And I would like to keep it that way.
 
I’m very late to the party (not sure why this thread didn’t show up in my feed for 8 months???) but thank you for posting such clear pics of the build process. Though I respect and appreciate beauty and bling such as MOP inlay work, “unique” and “functional” are the only two boxes if’s ever necessary to check to impress me. Bravo!
 
Top Bottom