Island Jim
Well-known member
- Joined
- May 5, 2022
- Messages
- 200
- Reaction score
- 532
Very nice work everybody, there sure are a lot of talented luthiers around these parts! I'd better stop golfing and get to work!
Had a request to purchase the Blackwood with Torrified Sitka so here they are with bodies before I applied pore filler.Which soundboard choices did you go with in the end?


damn! wild as all get out. 4 frets? serious? and the nut design...gotta have a sound demo. it's gorgeous.View attachment 171163View attachment 171164View attachment 171165View attachment 171166View attachment 171167Ok, so I'm no Luthier, that's for sure...but had some fun in my Shop this weekend using up some scrap barnwood, and leftover junk...FUN!
Haha Thanks...but it's not a player...it's just a wallhanger! Only an inch thick! Told ya, I'm no Luthier...but love playing with barnwood, and junk. Gonna make a bunch more, cuz I've got lots of scrapwood and junk to usedamn! wild as all get out. 4 frets? serious? and the nut design...gotta have a sound demo. it's gorgeous.
 . I'll make one for you, if ya want

Love that overlap trick. It leaves a nice cutoff for the headstock.
How did you get those wavy edges to match up so exactly?
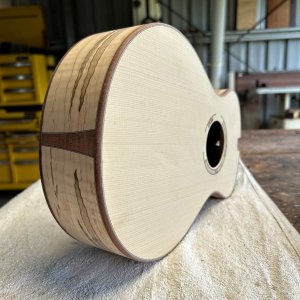
i’m trying out a few with soundholes (and side dots) on both sides for the Southern Uke Store. this is the 3rd one done like this. the first 2 sounded great so i don’t think the extra soundhole is taking away from the sound. i also didn’t compensate the bridge on these, so hopefully if a lefty picks it up, the strings just need to be switched. there might be some saddle adjustment needed for intonation. it also has a zero fret so probably wouldn’t need any adjustment on the nut.Is that a lefty? Or the photo is reversed? Or soundholes on both sides?
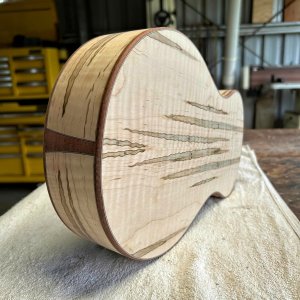
i follow the natural live edge down the side of the left piece. i do take the smallest spindle sander i have and try to not have too many wavy parts smaller than that smallest spindle. then i use the left piece to draw that edge on the right piece. then take it to the bandsaw and then over to that small spindle sander. it takes a little bit of back and forth work to get it to line up nicely. Then i glue them together like any other top. i also do some thoughtful custom bracing around the soundhole and the seam.How did you get those wavy edges to match up so exactly?

oh i love cutoffs. especially curly koa ones. ever since i started doing more inlay work primarily with wood, i use up soo much more cutoffs.Love that overlap trick. It leaves a nice cutoff for the headstock.
That is absolutely amazing, and SO BEAUTIFUL!!!i follow the natural live edge down the side of the left piece. i do take the smallest spindle sander i have and try to not have too many wavy parts smaller than that smallest spindle. then i use the left piece to draw that edge on the right piece. then take it to the bandsaw and then over to that small spindle sander. it takes a little bit of back and forth work to get it to line up nicely. Then i glue them together like any other top. i also do some thoughtful custom bracing around the soundhole and the seam.
here’s the first time i did one of these live edge seams. but didn’t do the spindle trick. it took a lot longer.
View attachment 171829